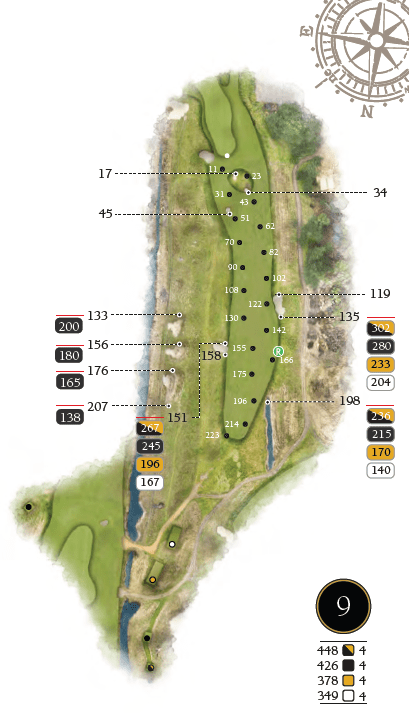
This demanding par 4 ensures a difficult finish to the Himalayas. Teeing off above the fairway the ideal line is aiming towards the fairway bunker on the right with longer hitters able to aim further left. The approach is dominated by the prestigeous Sarazen Bunker to the left of the green which will leave you with a very tough recovery shot. A tough finish to the demanding Himalayas.
| Tee | Yards | Par | S.I. Front | S.I. Back |
|---|---|---|---|---|
| 488 | 4 | 10 | 9 | |
| 426 | 4 | 10 | 9 | |
| 378 | 4 | 10 | 9 | |
| 349 | 4 | 9 | 10 |

Pro's tip
One of the best holes on the course has become even tougher with the recent changes. New tee boxes have extended the hole and two new bunkers either side of the fairway are almost guaranteed to force you to have to play sideways. Tee shots on the right side of the fairway leave the perfect angle to approach the green and best chance to avoid the giant ‘Sarazen Bunker’ short left of the green. Another extremely long green means distance control is paramount to secure a well-earned par.


